Firebase and AS3
Episode 2 : Login with OAuth 2.0
Hi there. I hope you are well.
In this episode, we will see how to identify a user with OAuth 2.0 and AS3.
First, you’ll need OAuth 2.0 AS3 library. You can get it here.
To use OAuth 2.0 AS3 library, you’ll need two others libraries:
- as3corelib
- as3-commons
Links to download and licenses are provided on the GitHub page of the OAuth 2.0 AS3 library page.
Create your project
Create your project with your preferred IDE (personnally, for this project, I use Flash Builder 4.7).
For this tutorial, I choose Starling / Feathers and I will build a mobile project.
Right now (August 2016), there is a buzz around Pokémon Go game. So… We will build an application that geolocalize pokémons on a map.
I hear you complain: Why Pokémon Go !! I would answer simply: Because it’s like that! 😀
Let’s go!
Link the mentioned library (SWC or source code) to your project. I assume that you know how to do that. This is really a basic operation.
Create the buttons and the StageWebView
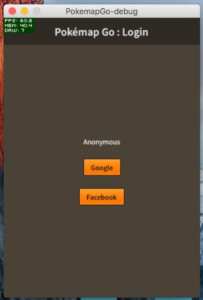
On your home screen, create 2 buttons: Google Login Button and Facebook Login Button.
Most important thing, you have to create a StageWebView. It will serve to show login forms from Google and Facebook.
With Starling and Feathers, you create buttons very simply with this few lines of code:
|
1 2 3 4 5 6 7 8 9 |
var _googleBtn:Button = new Button(); _googleBtn.label = "Google"; _googleBtn.addEventListener(starling.events.Event.TRIGGERED, onGoogleBtnTriggered); this.addChild(_googleBtn); var _facebookBtn:Button = new Button(); _facebookBtn.label = "Facebook"; _facebookBtn.addEventListener(starling.events.Event.TRIGGERED, onFacebookBtnTriggered); this.addChild(_facebookBtn); |
For the StageWebView, this is done with:
|
1 |
private var _stageWebView:StageWebView; |
Make sure you create your StageWebView outside a function to be sure you can access it from anywhere. 😀
Now… the magic… Let’s create buttons click handlers.
Create the buttons click handlers
We have our buttons and our StageWebView… So, it’s time to code some event triggerers.
|
1 2 3 4 5 6 7 8 9 10 11 12 13 14 15 16 17 18 19 20 21 22 23 24 25 26 27 28 29 30 31 32 33 34 35 36 37 38 39 |
private function onGoogleBtnTriggered():void { trace ("Login Google Button Triggered"); user.provider = "google"; this._stageWebView = new StageWebView(); this._stageWebView.stage = Starling.current.nativeStage; this._stageWebView.viewPort = new Rectangle(0,0,Starling.current.nativeStage.fullScreenWidth,Starling.current.nativeStage.fullScreenHeight); var oauth2:OAuth2 = new OAuth2("https://accounts.google.com/o/oauth2/auth", "https://accounts.google.com/o/oauth2/token", LogSetupLevel.ALL); var grant:IGrantType = new AuthorizationCodeGrant(_stageWebView, "YOUR_GOOGLE_PROJECT_ID", "YOUR_GOOGLE_PROJECT_SECRET", "https://YOUR_FIREBASE_PROJECT_ID.firebaseapp.com/__/auth/handler", "https://www.googleapis.com/auth/userinfo.email https://www.googleapis.com/auth/userinfo.profile https://www.googleapis.com/auth/plus.login", null); oauth2.addEventListener(GetAccessTokenEvent.TYPE, onGetGoogleAccessToken); oauth2.getAccessToken(grant); } privatefunction onFacebookBtnTriggered():void { trace ("Login Facebook Button Triggered"); user.provider = "facebook"; this._stageWebView = new StageWebView(); this._stageWebView.stage = Starling.current.nativeStage; this._stageWebView.viewPort = new Rectangle(0,0,Starling.current.nativeStage.fullScreenWidth,Starling.current.nativeStage.fullScreenHeight); var oauth2:OAuth2 = new OAuth2("https://www.facebook.com/dialog/oauth", "https://graph.facebook.com/v2.3/oauth/access_token", LogSetupLevel.ALL); var grant:IGrantType = new AuthorizationCodeGrant(_stageWebView, "YOUR_FACEBOOK_APPLICATION_ID", "YOUR_FACEBOOK_APPLICATION_SECRET", "https://YOUR_FIREBASE_PROJECT_ID.firebaseapp.com/__/auth/handler", "public_profile,email,user_birthday,user_friends", null); oauth2.addEventListener(GetAccessTokenEvent.TYPE, onGetFacebookAccessToken); oauth2.getAccessToken(grant); } |
Do you remember? In the Episode 1, we saw how to create your Firebase project and your Google OAuth 2.0 and Facebook OAuth 2.0 applications. So this is the right time to use the IDs and Secrets you generate in the previous step. 😀
In OAuth 2.0 login and token request, we use a scope variable (that can be a multiple scopes string). For the need of this tutorial, we just ask for basic information, but you can do more than that. Just take a look at the scopes allowed by the systems you are using.
Get the Access Token
Now that we do a valid OAuth 2.0 login request, it’s time to get our token. Right?
You do it with this few lines of code:
|
1 2 3 4 5 6 7 8 9 10 11 12 13 14 15 16 17 18 19 20 21 22 23 24 25 26 27 28 29 30 31 32 33 34 35 36 37 |
private function onGetGoogleAccessToken(getAccessTokenEvent:GetAccessTokenEvent):void { if (getAccessTokenEvent.errorCode == null && getAccessTokenEvent.errorMessage == null) { // success! trace("Your access token value is: " + getAccessTokenEvent.accessToken); user.token = getAccessTokenEvent.accessToken; this._stageWebView.stage = null; this._stageWebView = null; testAPI(user.provider); } else { trace ("FAIL : " + getAccessTokenEvent.errorMessage); } } privatefunction onGetFacebookAccessToken(getAccessTokenEvent:GetAccessTokenEvent):void { if (getAccessTokenEvent.errorCode == null && getAccessTokenEvent.errorMessage == null) { // success! trace("Your access token value is: " + getAccessTokenEvent.accessToken); user.token = getAccessTokenEvent.accessToken; this._stageWebView.stage = null; this._stageWebView = null; testAPI(user.provider); } else { trace ("FAIL : " + getAccessTokenEvent.errorMessage); } } |
OK… if everything is ok, you got a token and the StageWebView was closed. Or, if something was wrong, you got an error message that help you to debug quickly your application.
Get the user profile
It’s now time to get the user profile we get from Google or Facebook (remember, this is the “scope” that we request).
|
1 2 3 4 5 6 7 8 9 10 11 12 13 14 15 16 17 18 19 20 21 22 23 24 |
private function testAPI(provider:String):void { var request:URLRequest; if (provider == "google") { request = new URLRequest("https://www.googleapis.com/plus/v1/people/me?access_token="+user.token); } elseif (provider == "facebook") { request = new URLRequest("https://graph.facebook.com/me?fields=id,name,picture&redirect=false&access_token="+user.token); } request.method = URLRequestMethod.GET; var requestor:URLLoader = new URLLoader(); requestor.addEventListener( flash.events.Event.COMPLETE, httpRequestComplete ); requestor.addEventListener( IOErrorEvent.IO_ERROR, httpRequestError ); requestor.addEventListener( SecurityErrorEvent.SECURITY_ERROR, httpRequestError ); requestor.load( request ); } protectedfunction httpRequestError(event:ErrorEvent):void { trace( "An error occured: " + event.text ); } |
As you can see, we are asking to provider servers some information about our logged in user. Be careful and remember this simple thing:
More you ask for information, less your users will trust you !
And… Write the user profile in Firebase Database
Now that you got a valid token and the user profile, it’s time to write it to your Firebase Database.
This is done with very few lines of code:
|
1 2 3 4 5 6 7 8 9 10 11 12 13 14 15 16 17 18 19 20 21 22 23 24 25 26 27 28 29 30 31 32 33 34 35 36 37 38 39 40 41 42 |
protected function httpRequestComplete(event:flash.events.Event):void { //trace( event.target.data ); var obj:Object = JSON.parse(event.target.data); var profile:Object = new Object(); profile.uid = obj.id; profile.provider = user.provider; if (user.provider == "google") { profile.displayName = obj.displayName; profile.picture = obj.image.url; } elseif (user.provider == "facebook") { profile.displayName = obj.name; profile.picture = obj.picture.data.url; } user.profile = profile; _nameLabel.text = user.profile.displayName; var payload:Object = new Object(); payload.token = user.token; payload.provider = user.provider; payload.iat = int(new Date().getTime() / 1000); payload.v = "0"; payload.d = user.profile; user.auth = JWT.encode(payload, "YOUR_FIREBASE_PROJECT_SECRET"); var request:URLRequest = new URLRequest( "https://YOUR_FIREBASE_PROJECT_ID.firebaseio.com/users/"+user.profile.uid+".json?auth="+user.auth); request.method = URLRequestMethod.PUT; request.data = JSON.stringify(user.profile); var requestor:URLLoader = new URLLoader(); requestor.addEventListener( flash.events.Event.COMPLETE, createdUser ); requestor.addEventListener( IOErrorEvent.IO_ERROR, httpRequestError ); requestor.addEventListener( SecurityErrorEvent.SECURITY_ERROR, httpRequestError ); requestor.load( request ); } |
Maybe you want a little bit more information about how it works…
OK. First, we are creating the object that we push in Firebase database. This is the profile of the user that logged in. We have some different fields as we use Google or Facebook (or another OAuth 2.0 compliant system provider).
Then we create the JWT (JSON Web Token) that will be used to secure our communication with Firebase Servers.
We create a payload and sign it with the simple (very simple) class that I’ve created to allow this. And with all this elements, we send a REST query to Firebase servers.

What next? Let’s play a little bit more…
With this episode, you are able to :
- Login with OAuth 2.0
- Get your user profile
- Write it to your Firebase Database
So… What next? We will play a little bit more with this and try to geolocalize a phone, choose a Pokémon name in a list and write this information in our Firebase Database in order to put a marker on a map.
I hope everything is clear. Do not hesitate to re-read this episode to let things be clearer.
If you’re ready, rendez-vous in the Episode 3.
PAY ATTENTION !! In fact, this is a very bad practice to incorporate your Firebase Secret Key in an application that can be easily decompiled (and SWF can be reversed). This exercise is just meant to show that use of the REST service firebase is possible from AS3. Acquire JWT from Firebase server (or your own server) remains the best option and can be easily achieved through a simple HTML page using the Web SDK Firebase and a WebView.
